
Bubbles
Whether you’re in the bath or washing-up in the kitchen, nothing makes a daily chore more fun than bubbles.
No, really. Bubbles are fun. Serious fun.
The science behind bubbles is fascinating, because it relies on the physics of water. We’re so used to water being all around – heck, it falls out of the sky! – that we don’t stop to think about how weird it is. That ice cubes float is amazing, because with almost every other material the solid is more dense than the liquid, so they sink. Whereas ice takes up just a little more space than liquid water, so it floats.

You can get an idea for just how weirdly water behaves even more easily: fill a glass all the way to the brim, then keep going. You’ll see the water bulge upwards, like this. That happens because water molecules interact with each other and with the glass, just a little bit. It’s a very small effect, but it’s enough to cause water to tend to clump together, to flow a little distance up the side of a glass, and to bulge like this.

Gently place an object on the surface – like this rather tatty-looking paperclip we found kicking around in the Think Physics office – and you can see the curve of the water surface around the object. That curve is what provides the force balancing the weight of the object.
Water surfaces do amazing things when you start to muck around with the water itself. Add a little detergent – washing-up liquid is enough – and that spreads out on the surface forming a layer between the water and the air. We all know what happens next:
Alas! The Vine animation which used to live here is long gone. Sorry!
We bought a commercial bubble wand to blow giant bubbles, but you can make something very similar yourself using fabric tape and an old broom handle. Here’s Joe practicing his giant bubble technique in Think Lab.
Yes, we mopped up afterwards.


Exploring bubbles with the RI
The simplest bubble recipe is easy to make: washing-up liquid and water! Start with a bowl of lukewarm water and gentle add washing-up liquid. As you add, keep checking your mixture with a bubble wand until you find a solution that works for you. You won’t need very much detergent, so don’t go mad with it!
Then, find anything with a hole in it and start blowing. The gallery above has some examples, and the Royal Institution’s video here has some great ideas for experiments.
Other fun with bubbles

Bubble snakes: find a plastic tube that’s open at both ends and fix a flannel or dishcloth over one end with an elastic band. Dip the flannel into your bubble solution and then blow down the tube. Watch as the bubbles join to create a bubble snake. Try adding some different paint colours to the flannel to create a colourful snake!
 Giant bubbles: these are a little more technical. You can still get away with washing-up liquid and water, but you search around the web you’ll find dozens of recipes for extra-impressive bubble mixtures. Most of them add a small amount of glycerine, which can help your bubbles last longer. Other ingredients might be tricky to get hold of in small quantities, so if you’re super-serious it’s worth looking at commercial mixtures. At Think Physics, we’re quite impressed with Dr Zigs’ solution. Our bubble wand came from Amazon, but using garden canes and some fabric tape you can easily make your own.
 Bubble painting. This looks terrific, though no less messy than the other ideas. Add a bit of food colouring into your bubble mixture, blow some foam, then carefully splat the foam with a sheet of paper. Nice results.
Viewing soap film colours
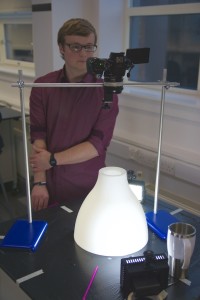
Prototype soap bubble viewer, with Joe for scale
The colours you see in a soap bubble are a result of the way light interacts with the thin film of the bubble surface. Soap films are about the same thickness as the wavelength of visible light, and the reflections from the front and back surface of the film interfere, leading to the spectrum you see.
We did a quick write-up of a highly effective way of viewing the colours back in November. The longer version goes like this:
- Stretch some black bin bag across a table.
- Splat some bubble mixture on the plastic, smear it around a bit, then blow a half-bubble about six centimetres across.
- Shield the half-bubble with something that will diffuse light – Ikea Melodi lampshades are perfect.
- Light strongly from the side – so place your table near an open window, or use lamps alongside the lampshade.
- Look (or photograph) straight down at the bubble.
You’ll see particularly strong colours, and with a bit of tinkering the bubble can last for many minutes. As the mixture drains downwards you’ll see the colours slide down the sides of the bubble.

